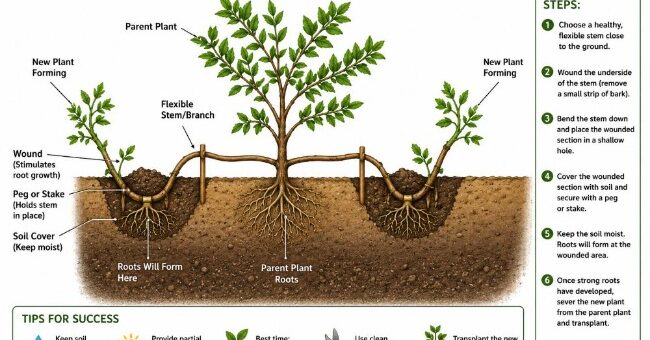
How to create new plants with layering
Click Here for larger image Layering — One of the Easiest and Most Reliable Ways to Propagate Garden Plants Layering is one of the oldest and most reliable propagation techniques in the gardener’s toolkit....
The home of gardening Knowledge
Click Here for larger image Layering — One of the Easiest and Most Reliable Ways to Propagate Garden Plants Layering is one of the oldest and most reliable propagation techniques in the gardener’s toolkit....
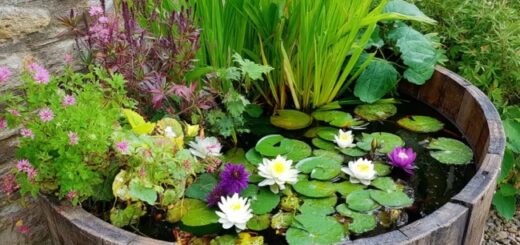
How to Create a Half Barrel Water Feature in Your Garden A half barrel water feature is one of the most satisfying garden projects you can undertake. It requires no digging, no specialist equipment,...

Sow Now for a Stunning Cut Flower Display in Late Summer and Autumn If you love having fresh flowers in the house but want to grow your own, June is still a brilliant month...
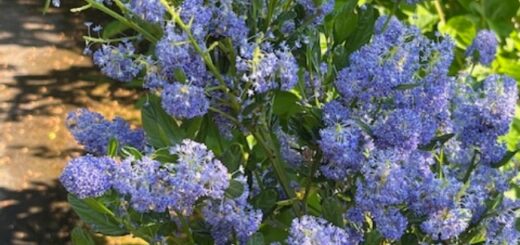
Ceanothus, commonly known as California Lilac, is one of the most spectacular flowering shrubs for the garden, producing masses of blue, purple, or white flowers in late spring and early summer. While often regarded...
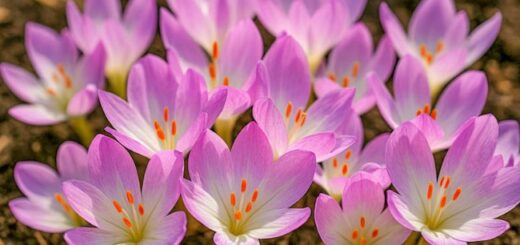
Autumn Crocus are a great mini project over the next couple of months planting the bulbs to provide autumn colour I am thinking maybe in the borders or in the base of the box...

Introduction to Growing Grapes Growing grapes can be a rewarding and enjoyable experience, whether you’re interested in producing wine, making jelly, or simply enjoying fresh fruit. Grapes thrive in a variety of environments and...
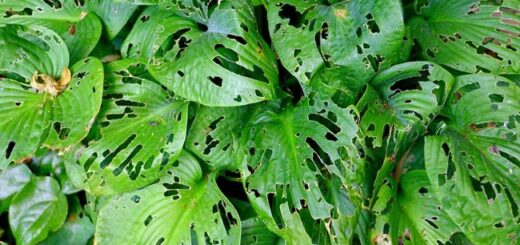
Slugs are notorious pests in vegetable gardens, known for their insatiable appetite for tender green plants. If you’re seeking a natural way to manage this problem, employing beer traps can be an effective and...

Introduction Fungal diseases pose a significant threat to the health of crops and plants alike. Among these, potatoes and apples are commonly affected, leading to diminished yields and compromised quality. However, gardeners and farmers...

Understanding Rose Replant Sickness Rose replant sickness is a common issue for gardeners looking to transplant or replant roses in areas where roses have previously thrived. This condition manifests when roses exhibit stunted growth,...

Late May: A Prime Time for Garden Pests If you’re nurturing your very own vegetable garden, late May is the moment to sharpen your eyes for pesky intruders. Think of your blossoming garden as...

The new Helene AI Database Search is designed to make gardening advice quicker, easier, and far more personal for GardenAdvice members. By clicking the three green buttons located at the bottom right-hand side of...


